
|
|
|
|
file=West9.htm; updated 4/4/98 CMIS 450 West Overshoe Municipal Library - Rolling Out An Application Project #6 Assignment Setup: You will need to copy the files LAB09.MDB, BOOKS.BMP, MAINT.BMP, REPORT.BMP, and TRANSACT.BMP from your instructor. You may download LAB09.EXE from my home page. This is a self-extracting file containing the files needed for this assignment. Do not use earlier versions of the assignment as LAB09.MDB will contain all corrected work up to this point in the project. By completing this lab you will learn to rollout an application using MS Access. You will combine all of the objects created in earlier laboratory sessions to create a unified application. This lab teaches you to:
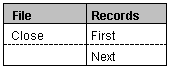
Exercise 1: Creating a Custom Menubar .In this exercise, you will create a custom menubar for the Member form. The menubar should look like this:
To create a custom menubar for the Member form: 1. Create a macro for the custom menubar. Note: The ampersand is used to indicate the short cut key for a menu option. For example, in the word "&File," the letter following the ampersand will appear underscored in the menu (File). Pressing ALT+ F activates the menu action. The letter directly after the ampersand becomes the shortcut key. 2. Create a macro group for each drop-down list. Create a macro group for the Records drop-down list. In this macro group, create the First entry by entering a Macro Name of &First and selecting an action of GoToRecord, indicating a Record argument of First. Add the Next entry to the macro group by entering a Macro Name of &Next and selecting an action of GoToRecord with a Record argument of Next. Close and save the macro group as Member Records Drop-Down. 3. Update the menubar macro to link the drop-down list macro groups to their menu
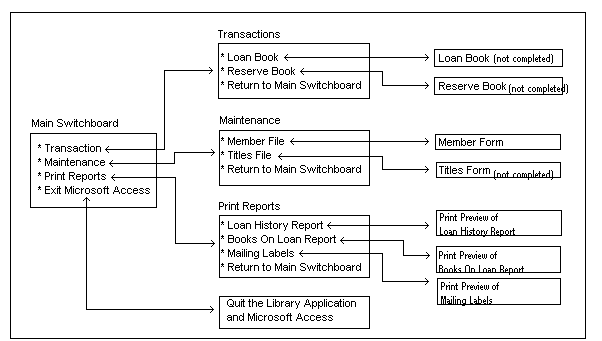
titles. 4. Update the Member form property sheet to utilize the new menubar. Now re-open the Member form in Form View. Look at the menu bar displayed at the top of the form. Try selecting the menu items. Cool, eh? IMPORTANT: Exercise 2: Creating Switchboards. In this exercise, you will review the flow of the Library application. This information translates into the menu structure that will be used to control the user’s navigation through the application. You will create the various forms to be used as menu switchboards in the Library application. You will follow the general steps listed below:
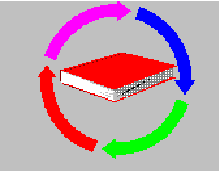
The Library Application Flow.
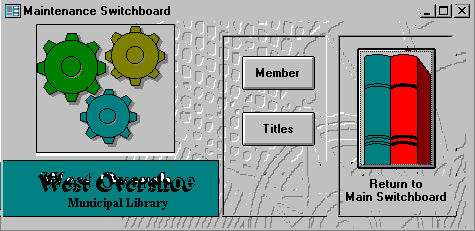
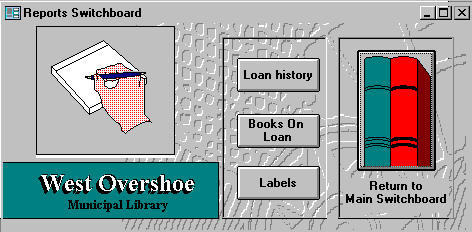
Note: The purpose of creating all the forms at this point is to make the form names appear in the appropriate combo boxes. To Create all the macros for all the switchboard forms: In the macro group, create the three macros needed for the Main Switchboard to open the Transaction switchboard, Maintenance Switchboard, and Reports Switchboard forms. To make the macro name meaningful, list the form name and then the macro name -- for example, Main Transaction. Tip: You can create a macro, and then copy and paste it to create additional macros. Change the macro name and the names that are referenced. Within each of these three macros, include an action to hide the Main Switchboard form. Use the SetValue action, and set the Visible value to False. Create a macro that exits Microsoft Access (to be used on the Main Switchboard form). Create three return macros (one for each of Transaction, Maintenance, and Report switchboards) that close the form and set the Main Switchboard Visible value to True. Save the Macro Group as Forms. To add the buttons to the switchboard forms and attach the macros: Add command buttons to the form for the following functions: Transaction, Maintenance, and Print Reports. Attach the macros that you created in the forms macro to the appropriate buttons. Add buttons to the Transaction Switchboard, Maintenance Switchboard, Maintenance Switchboard, and Reports Switchboard forms. Refer to the graphic of the application flow presented earlier. Note that we did not develop the forms corresponding to the Loan Book, Reserve Book, and Titles. When control is transferred to these, you should have the macro generate a message box that says "This Will Open The Loan Book Form," or some similar message depending on the form.. At this point, your Forms macro group should contain 14 macros named something
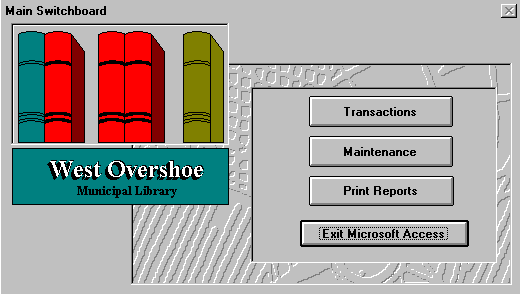
like: To test the functionality of the switchboard forms: To complete the Main Switchboard form: Add the graphics required to make your switchboard forms look similar to the ones pictured. The graphics are provided in the four BMP files you copied from the ftp site. The content of these graphic files are shown at the end of this document. NOTE: DO NOT WORRY ABOUT THE BACKGROUND GRAPHICS DESIGN YOU SEE ON THE SWITCHBOARDS
SHOWN HERE--SOME OF THEM WERE CREATED BY USING MICROSOFT PAINTBRUSH AND INSERTED AS .BMP
FILES.
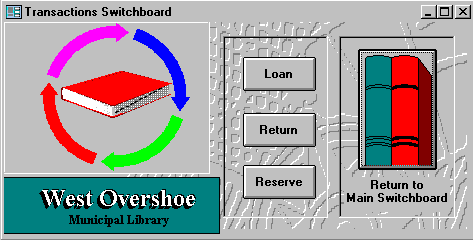
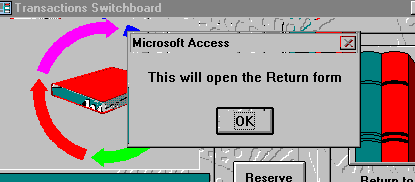
This next screen is displayed whenever you select the "Loan" or
"Reserve" options on the Transactions Switchboard because we did not develop the
forms corresponding to these actions. You DO NOT HAVE TO DEVELOP THESE FORMS. Simply code
message box macros like the one shown in the next screen.
To create an automatic startup for your application: Exercise 4: Setting Database Options. In this exercise, you will set various database options to control the functionality of Microsoft Access available to users. You will use macro actions to accomplish this. To disable database options: To enable database options: Tip: Copy the AutoExec macro to the Exit App macro and then reverse the settings so that all the options that were disabled are now enabled. Add an action to Close the Main Switchboard form. Save the macro as Exit App. Attach the Exit App macro to the Exit Microsoft Access button on the Main Switchboard form. You will replace the macro that was previously attached. To test the macros: Run the Exit App macro, and then verify that the options are enabled. Exercise 5. Final Modifications to the Main Switchboard. Remove the Control Box button and Minimize and Maximize button from the Main Switchboard form by setting these form properties to No and None, respectively.
TURN IN FOR GRADING: Turn-in a single high-density 3.5 inch floppy disk (your work should easily fit on a single disk) with your name printed on the disk using a felt-tip pen (do not use pencil or I will not grade the disks). The disks will be returned to you after I grade them. You do not have to turn-in your answers to the questions posed in the exercises above. The questions are provided merely to stimulate your thought processes.
|
|
 TRANSACT.BMP
 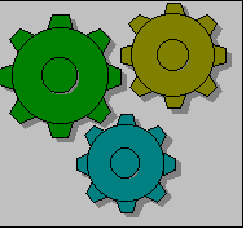 MAINT.BMP
 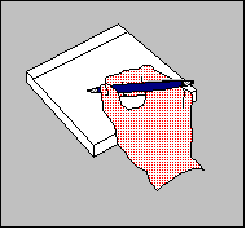 REPORTS.BMP